Leopards WiP

Incomplete masterpieces, what are you currently working on?

Re: Leopards WiP

Postby leopard » Sat Sep 20, 2014 1:37 pm

Been playing with my airbrush, bought it to do base coats and priming plus varnishes etc but the chance to have a play with soft edged camo was too good to miss.

So hunting for some volunteers my eyes found a pair of BF StuG III G that have been primed and waiting something doing with them for ages, not yet completed but here goes.

Image

Image

Airbrushed the base colours, then highlighted with a brush following a thin wash, please with how they came out but def need more practice but for a first effort happy enough


Also working on my airborne for Market Garden.. this little lot in progress

Image
User avatar
leopard
 
Posts: 3647
Joined: Sun Mar 30, 2014 6:55 pm
Location: Wombwell, Barnsley

Re: Leopards WiP

Postby leopard » Sun Sep 21, 2014 5:32 pm

Airborne progressed slightly, now need to finish the metals (black base is done, just two tones of grey) then the water bottles and finished.

Hope to get two platoons of engineers and an assault platoon from that lot with two spare flame thrower teams to swap in/out as desired.

may need a further platoon depending on the points total to run to, thoughts suggesting a further lot of infantry, possibly a Glider pilot platoon for the versatility.
User avatar
leopard
 
Posts: 3647
Joined: Sun Mar 30, 2014 6:55 pm
Location: Wombwell, Barnsley

Re: Leopards WiP

Postby leopard » Mon May 25, 2015 7:49 pm

Ribbit....

Image

WiP Perry 28mm French, not complete but not a bad start for a few hours work, they are faster than the British, mostly due to several having the greatcoats on covering most of the fiddly bits
User avatar
leopard
 
Posts: 3647
Joined: Sun Mar 30, 2014 6:55 pm
Location: Wombwell, Barnsley

Re: Leopards WiP

Postby leopard » Tue Aug 04, 2015 7:11 pm

Some slightly different armour, first time in years I've painted a 28mm vehicle..

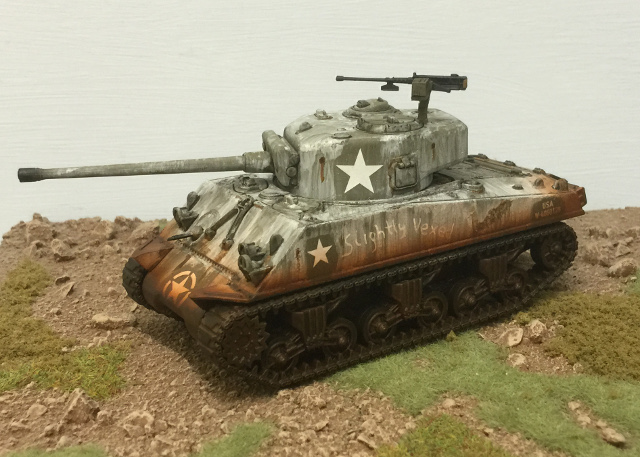
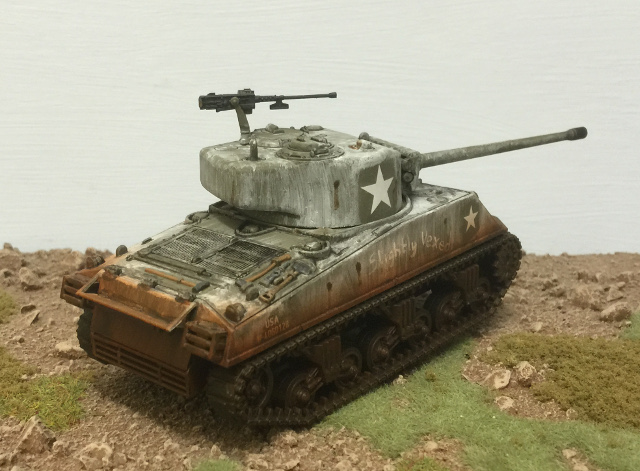
Rubicon M4A3 76mm first, "Slightly Vexed"

Image

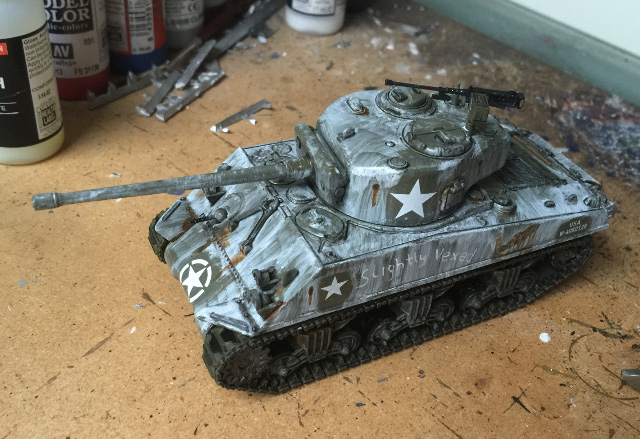
Base coat with Olive Drab primer, track rubber and tyres in black, tooling painted with a brown and grey set, all very basic, no shading or highlighting except on the tools and the .50 cal. Varnish, decals, then an oil based white wash - went for the look of something done badly by someone who didn't want to be doing it thats then been exposed to the rain.

More varnish, black lining, again with oils, bit of rust, oils yet again. Tracks need black lining and rusting up a bit then more varnish...

Plenty still to do.

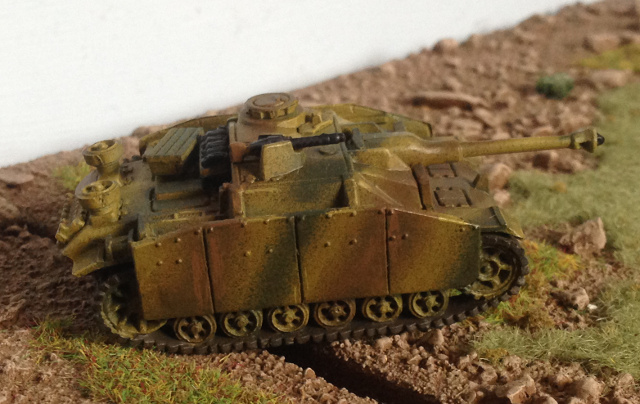
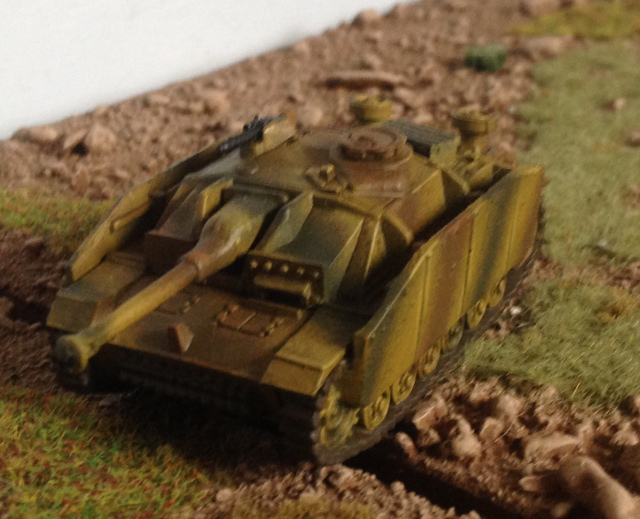
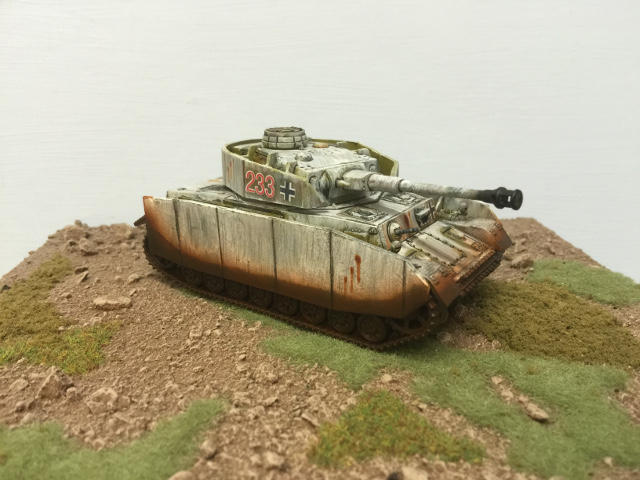
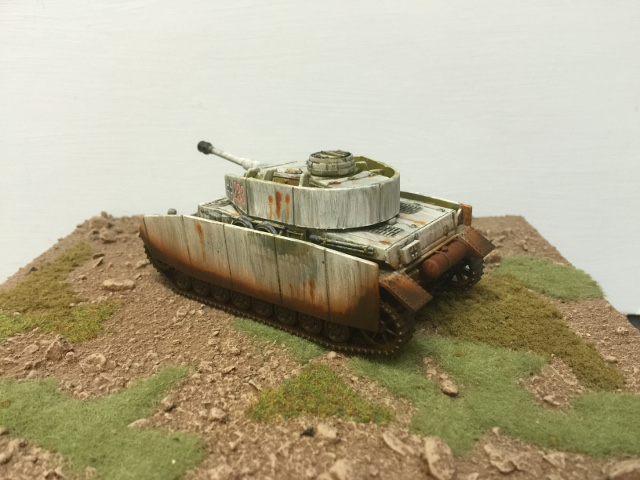
secondly we have a Panzer IVH, Rubicon again, not as nice to build as the M4 but not too bad

Image

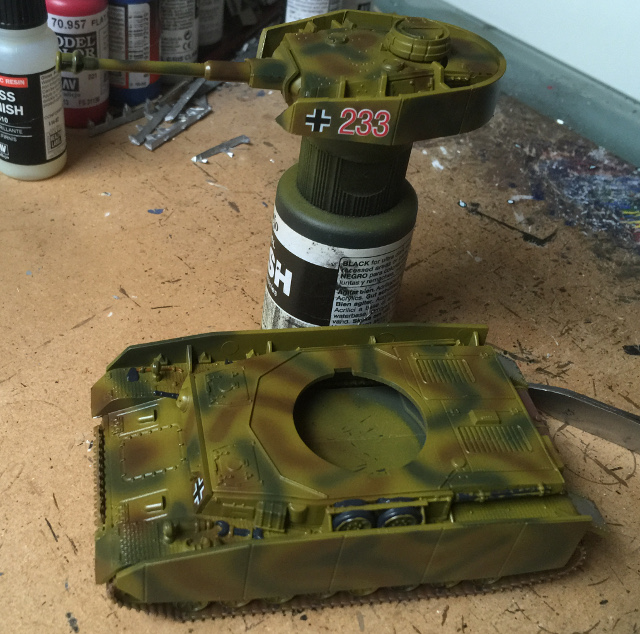
This is still at an earlier stage, just base colours, decals and varnish so far, once thats had a chance to harden will get a whitewash and black lining similar to the M4.

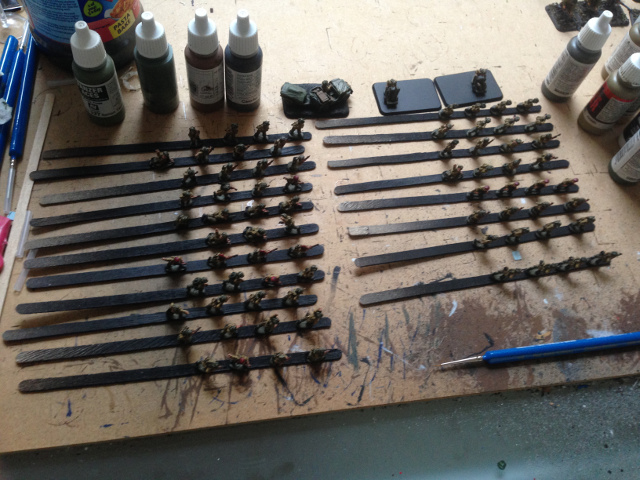
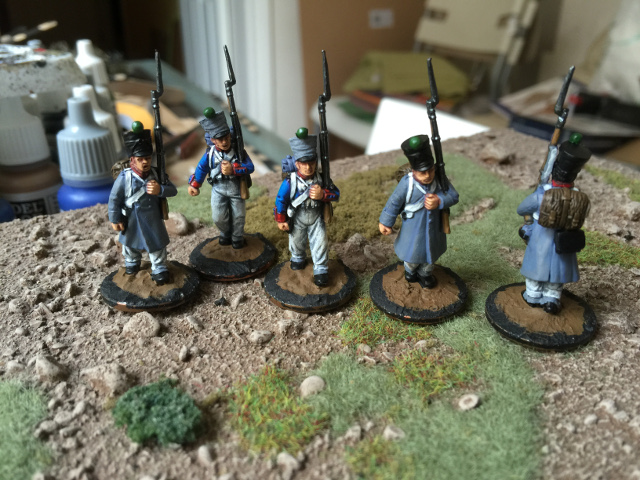
Book on order for SS infantry painting so can then make a start on the bods to work alongside them, also the American greatcoat bods and dismounted tank crew have arrived so just waiting on a few more bases and can start them as well.

WW2 in 28mm here we come...
User avatar
leopard
 
Posts: 3647
Joined: Sun Mar 30, 2014 6:55 pm
Location: Wombwell, Barnsley

Re: Leopards WiP

Postby Jimmy » Tue Aug 04, 2015 9:33 pm

nice work on the whitewash
Jimmy
 
Posts: 1728
Joined: Tue Apr 01, 2014 1:44 pm

Re: Leopards WiP

Postby leopard » Sat Aug 08, 2015 8:27 pm

Bit more progress, both tanks now with the basic painting finished, just the pigments and final touches to go on.

Image

Image

Image

Image

Brown is VMA Burnt Umber cut down to about 25% with thinners and applied as four coats using a filtering technique. Both kits have rotating turrets but the barrel elevation is fixed solid for the sake of sanity and to avoid droopy barrels, an ailment best avoided.

Really pleased with how the black lining on the panzer turned out.
User avatar
leopard
 
Posts: 3647
Joined: Sun Mar 30, 2014 6:55 pm
Location: Wombwell, Barnsley

Re: Leopards WiP

Postby leopard » Fri Oct 16, 2015 6:59 pm

Resin!

or, in this case Rubber!

Situation, we have a poorly nid, with a broken leg, someone had a bit too much omnomnom and the poor thing has lost an ankle. So, what to do?

Make a new leg!

Needed a leg to take a copy of, so one of the other nids who was heard sniggering at the others misfortune umm donated a leg, it fell off in my hand, honest guv.

Basic mould base made from plastiscene with some lego thus:

Image

Leg is pressed in to roughly where the mould line was, until I removed it. A few depressions made with a depressed tool to align the mould and thats that bit done.

Image

Flooded with a bit of rubber, vibrated a bit :o to get rid of air bubbles, and thats it until tomorrow when hopefully it can be removed and the other side made..

Time will tell.
User avatar
leopard
 
Posts: 3647
Joined: Sun Mar 30, 2014 6:55 pm
Location: Wombwell, Barnsley

Re: Leopards WiP

Postby leopard » Sun Nov 01, 2015 7:14 pm

Leg mould didn't really work, bits came out ok but too much air trapped, will have to have another think.

In the mean time some Relics..

First up some Nuem things, no idea what they are but easy enough to paint

Image

My newer stuff for the Britanan

Image

Dragoons, Marksmen, Hunting Dog pack & handler and a colour party for the troopers

And finally some of Donna's models, finally assembled

Image

Image
User avatar
leopard
 
Posts: 3647
Joined: Sun Mar 30, 2014 6:55 pm
Location: Wombwell, Barnsley

Re: Leopards WiP

Postby leopard » Tue Nov 24, 2015 7:10 pm

Team Yankee!

1/285th GHQ models.

Image

Hind D, base colours only, waiting varnish to allow lining, also need some decals which need ordering - will get them next time I get some of this stuff.

Col, your suggestion on Azure as the blue seems to be pretty much the ticket, the real thing is a bit darker but once these are lined up I think it will be spot on.

Image

T-72, waiting weathering with a bit of a dusty mud effect to apply to the sides. Turrets are glued in place, even if I had magnets to let them spin the barrel won't last long doing it so for FoW have to either mark the turret or just turn the tank, concession to the small size of the models.

Bases are just 25mm steel squares, or plastic with rubbery steel for the helicopters to allow the support pin, bit of gravel primed the Russian Green used for the rest of them, drydrushed 'flat green' then 'khaki', basic but it works.

Amazing models, lots of eye watering details.
User avatar
leopard
 
Posts: 3647
Joined: Sun Mar 30, 2014 6:55 pm
Location: Wombwell, Barnsley

Re: Leopards WiP

Postby Baldie » Tue Nov 24, 2015 9:24 pm

Looks good
Baldie
 
Posts: 3644
Joined: Tue Apr 01, 2014 6:13 pm

PreviousNext

Return to Work in Progress

Who is online

Users browsing this forum: No registered users and 5 guests

cron