Day Two!I went into day 2 in 6th place, well joint 6th, along with everyone below 5th… 1 win and two defeats, day two needed to restore some faith and position here.
Into game four, sit back, this is a good one…
Game Four2. Panzer under Haans takes on a Mixed Tankovy in
Dust Up.
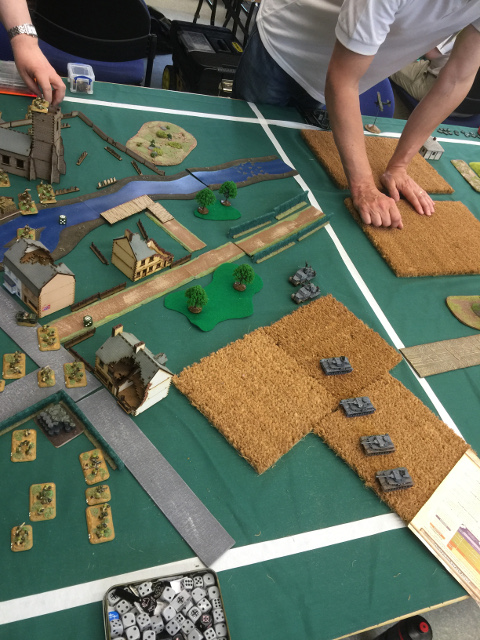
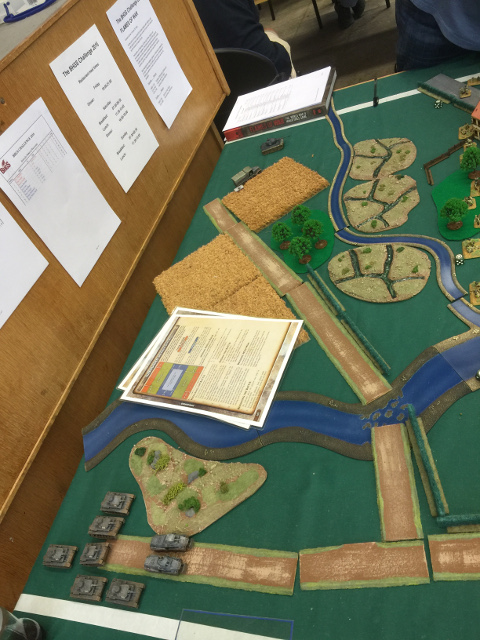
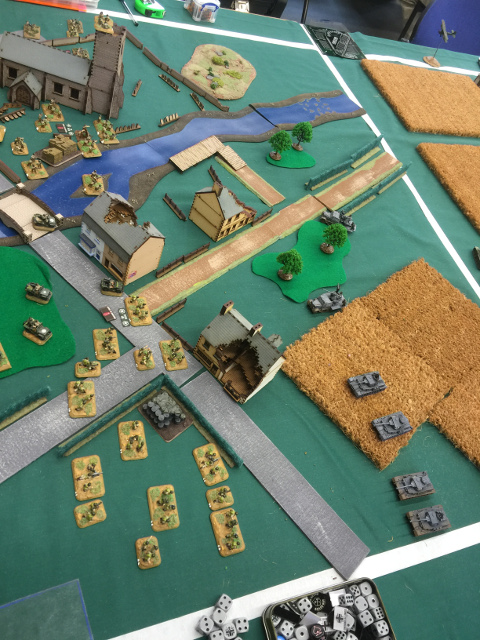
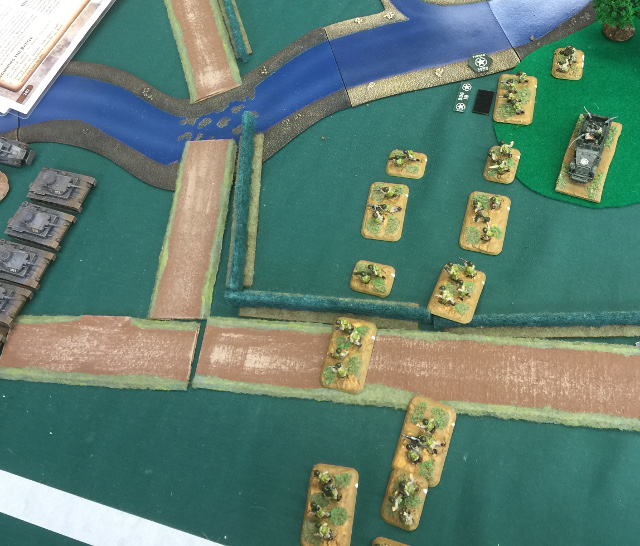
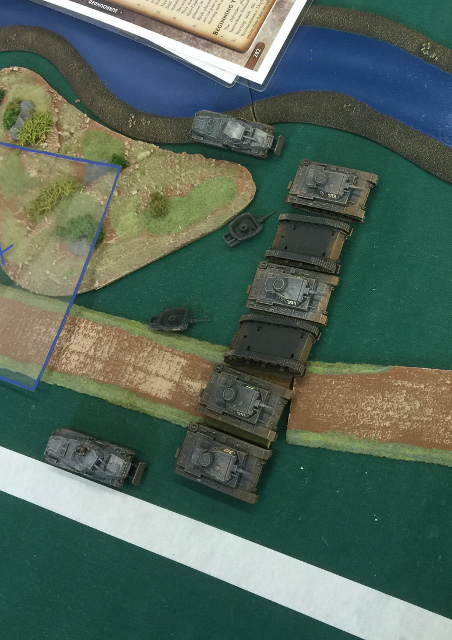
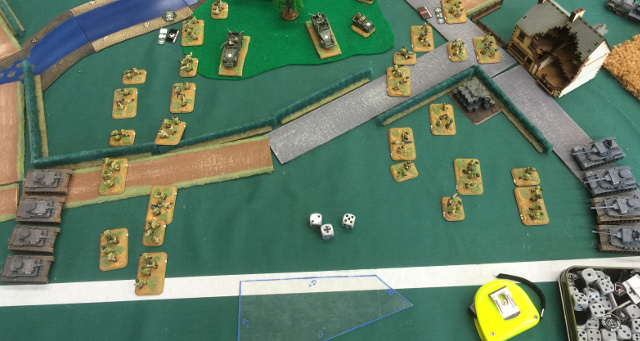
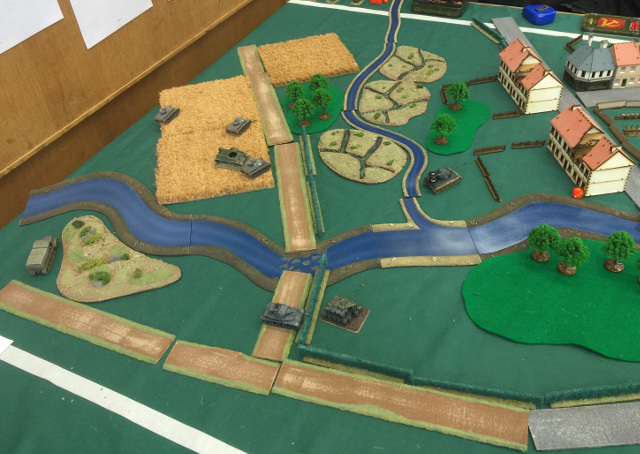
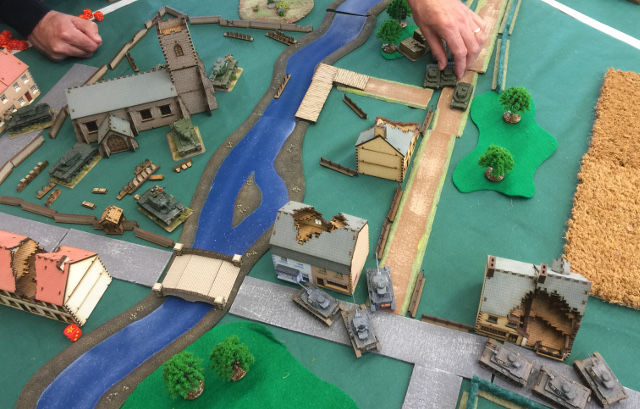
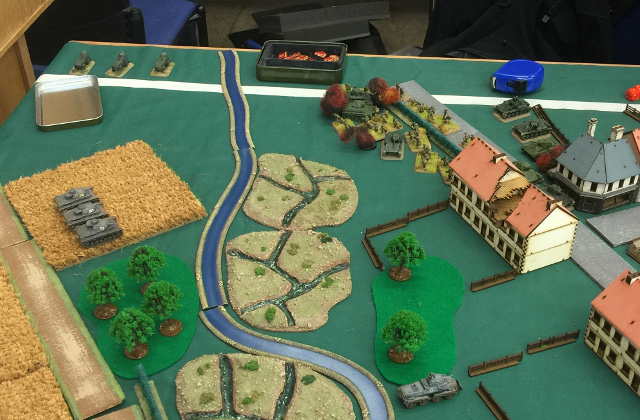
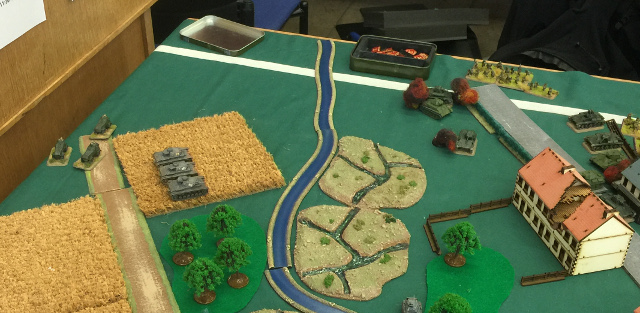
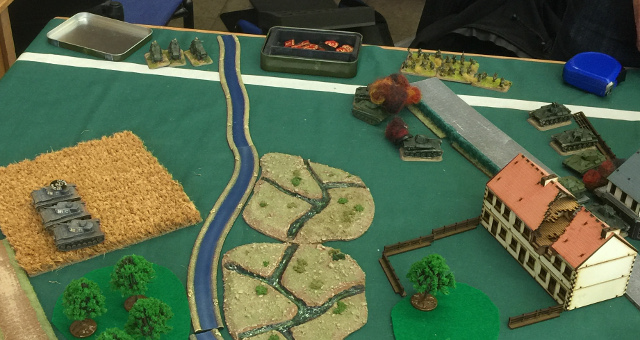
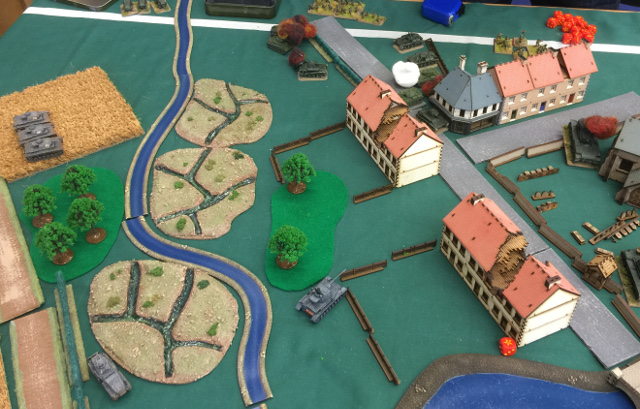
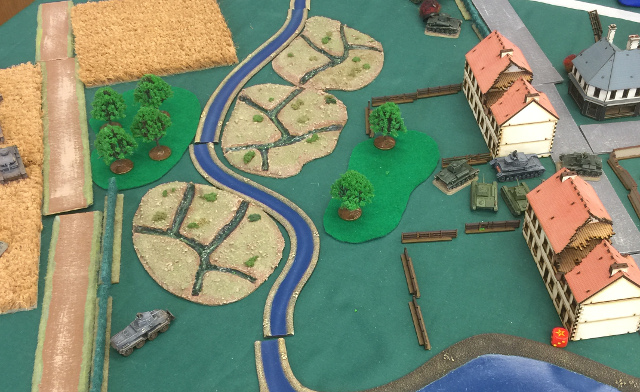
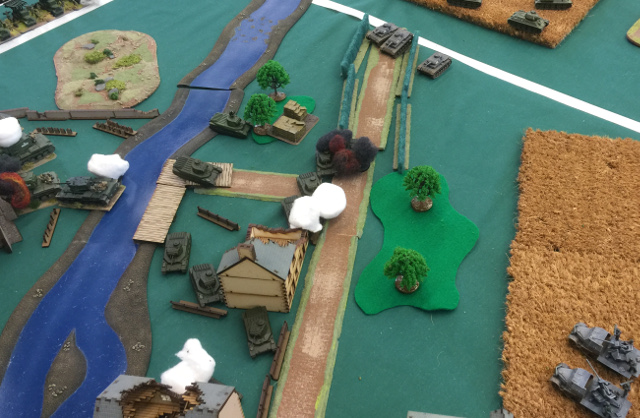
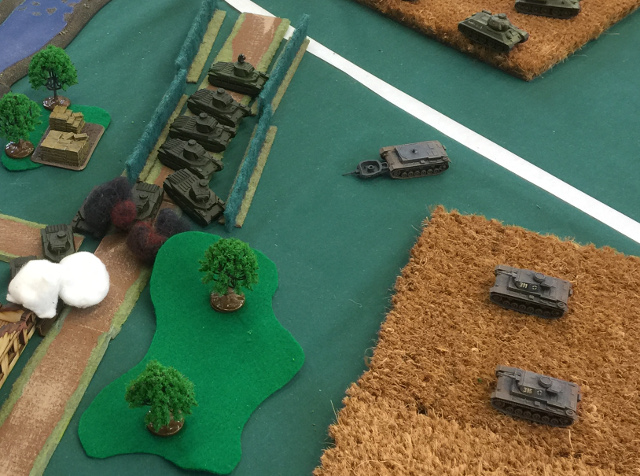
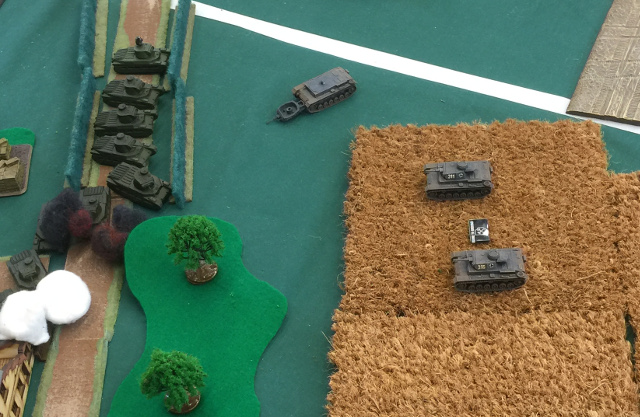
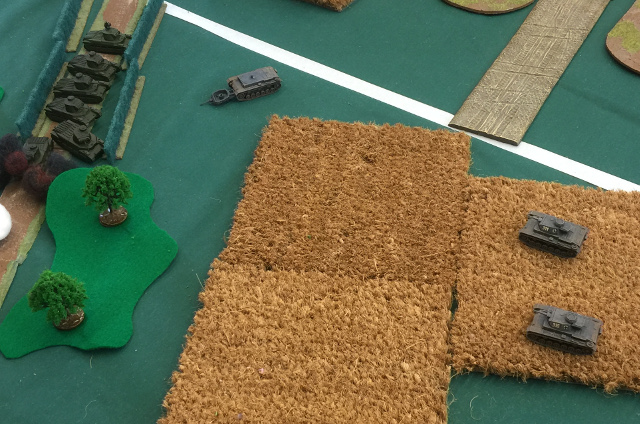
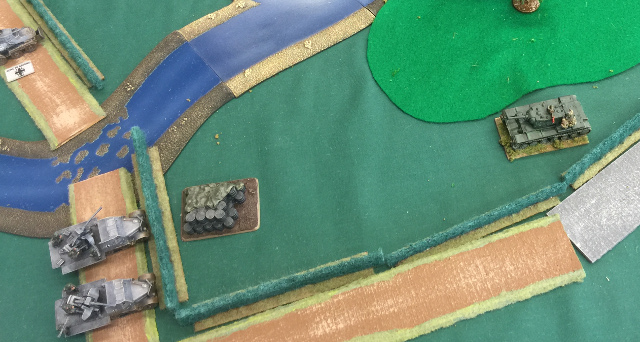
My opponent fields an oddball list, pictured below post recce moves (hence the pair of 8-rads lurking to the lower left)
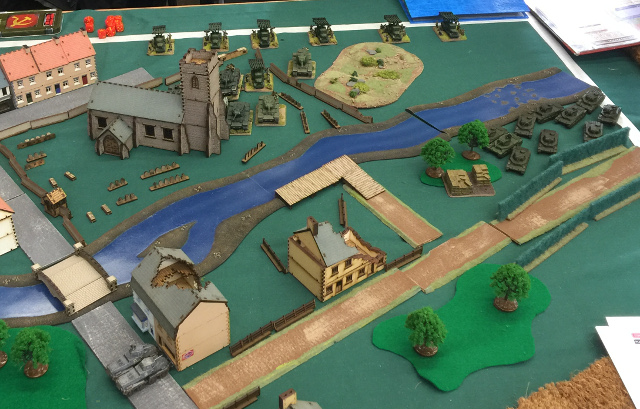
8x BM-13 Katyusha, a heavy tank platoon with 3x KV-1 and 2x KV-2 and 10x Matilda II. In reserve a platoon of tank escort infantry on foot, three armoured cars with AA MG and 10x T-70 light tanks.
Apparently loaded to fight infantry, but Haans was somewhat concerned, the Matilda II is essentially immune to the attentions of the Pz-IIIG so the lighter armour wasn’t overly useful.
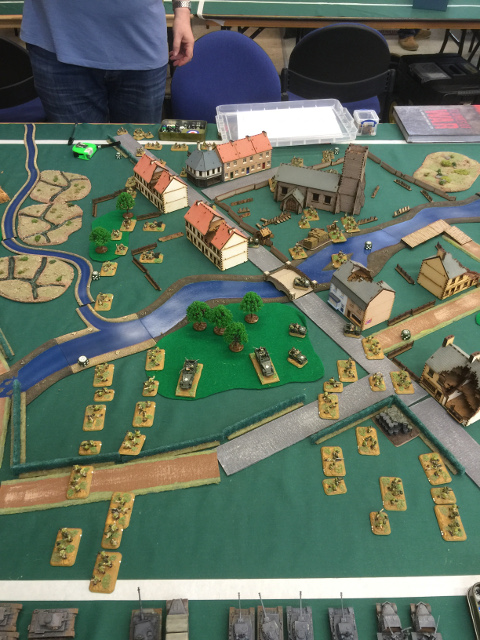
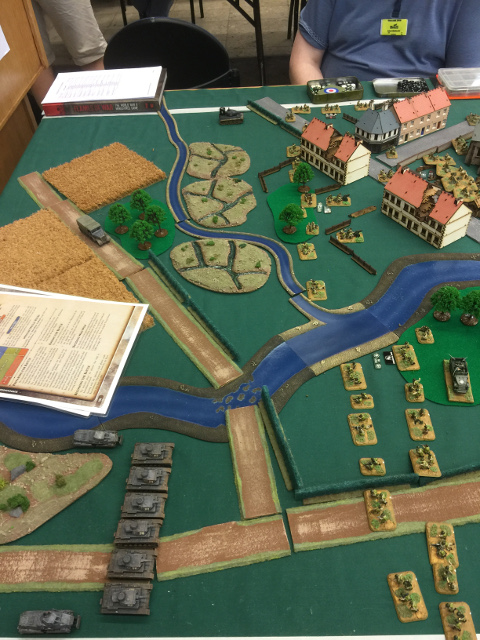
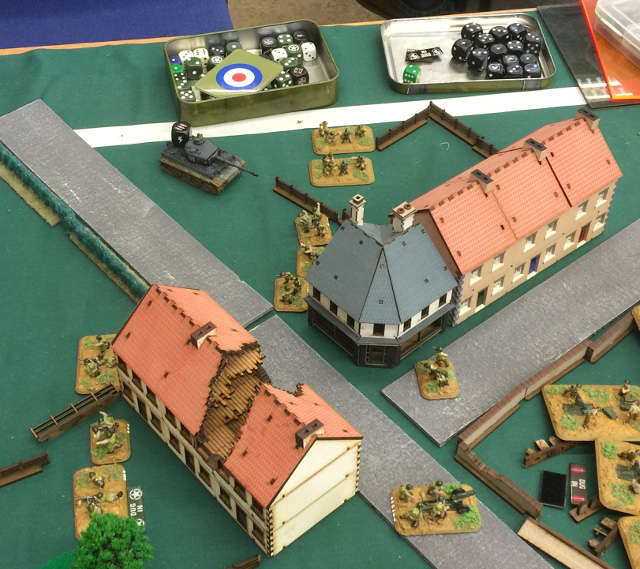
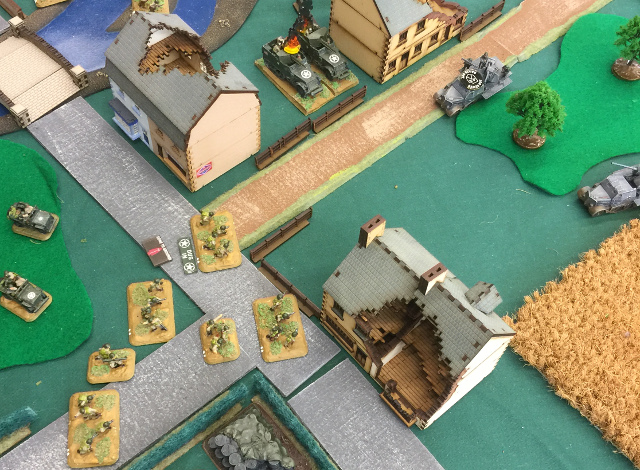
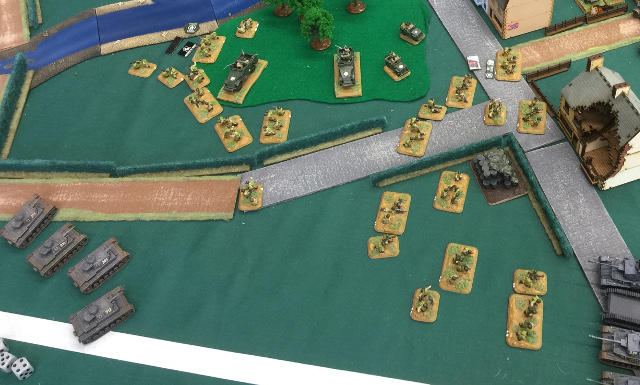
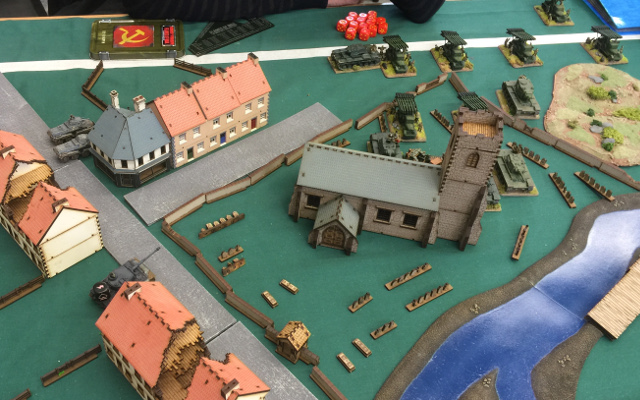
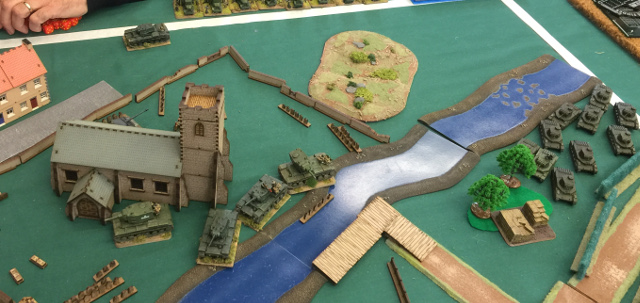
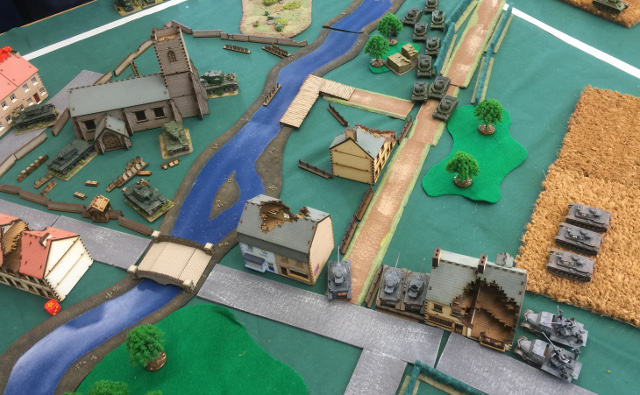
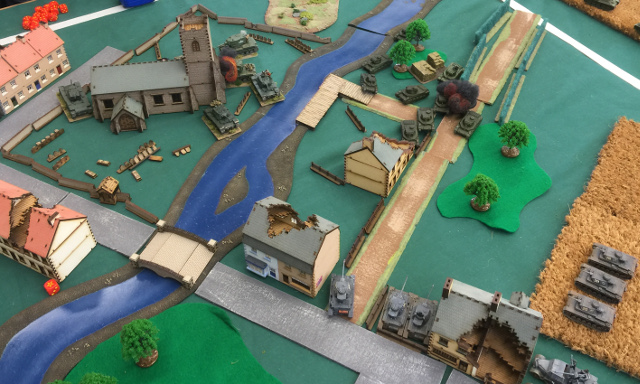
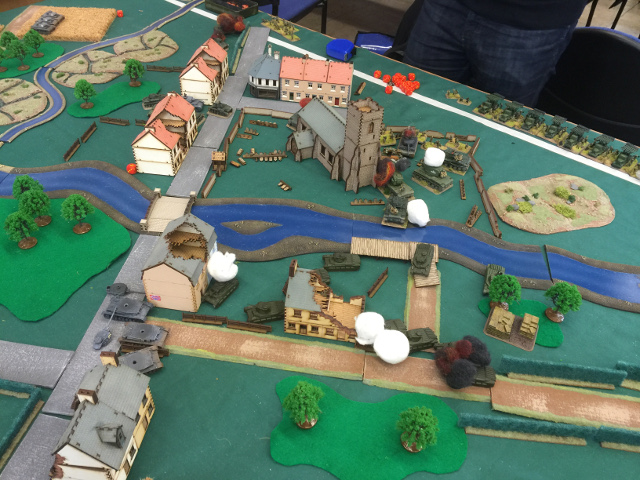
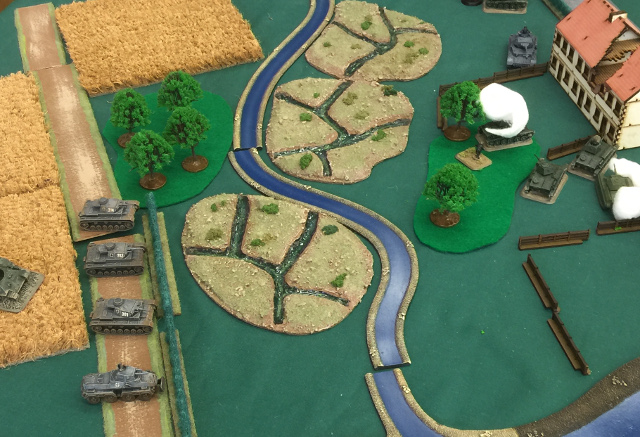
Hans deployed thus:
A tiger in an advanced position, the enemy had commented on how he thought it would be a very one sided game as he had little that could hurt a tiger, Haans intended to make this as one sided as possible..
Behind a platoon of three Pz-IIIG (the other two with the 2iC in reserve) and the CiC covered the objectives.
“da plan” was essentially to let tigger go and play and hopefully keep the enemy in their part of the table, murder his reserves as they arrived [u]then[/i] go on the offensive.
The stage was set.
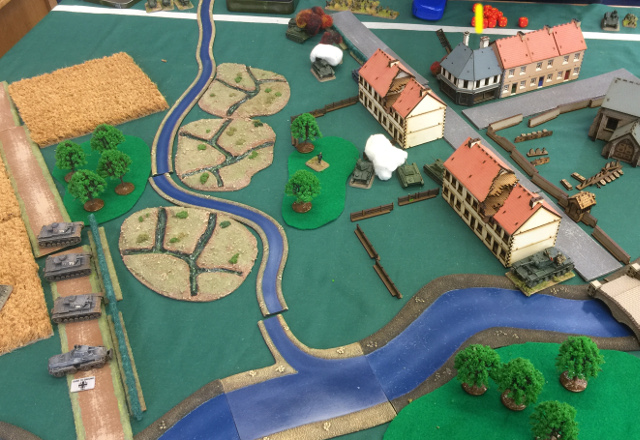
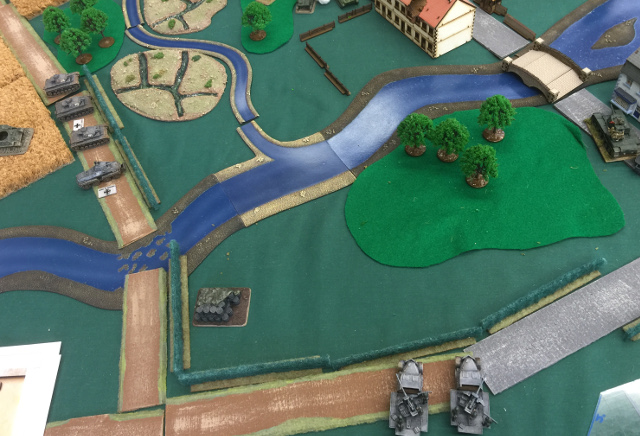
Turn OneMy Scout cars doubled to cross the table, lovely things roads, moving behind the houses, intending to pick on the BM-13 which could irritate tanks and are at least easy to kill, Tigger moved up as well, more slowly, and killed a BM-13 with his cannon.
Soviet response saw a KV-1 lining up on the scouts and the others moving to stay close enough, but trying to avoid a wandering tiger eye.
 Turn Two
Tigger moved up a bit more and fired at the KV-1, bailing it but sadly not killing it (failed firepower roll), the Scout cars got a pair of BM-13, the KV moved up a bit to get a few more shots.
He apparently contemplated pulled the artillery back, they are after all somewhat mobile but the two trapped by a wall changed his mind.
In then end the KV-1 stayed bailed, the remainder pulling back to avoid the same fate, very timid these Russians.
 Turn Three
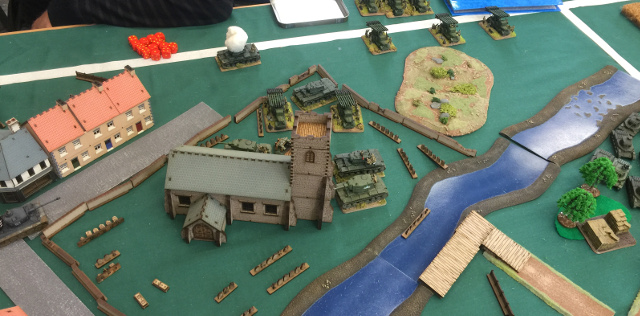
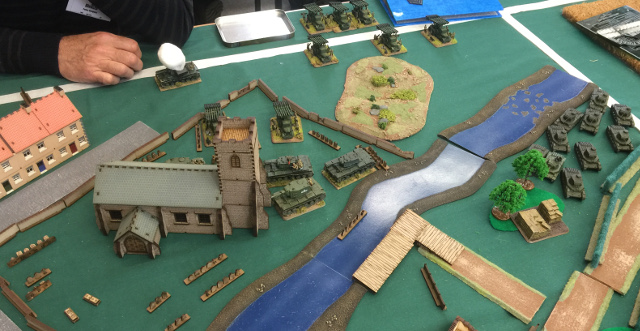
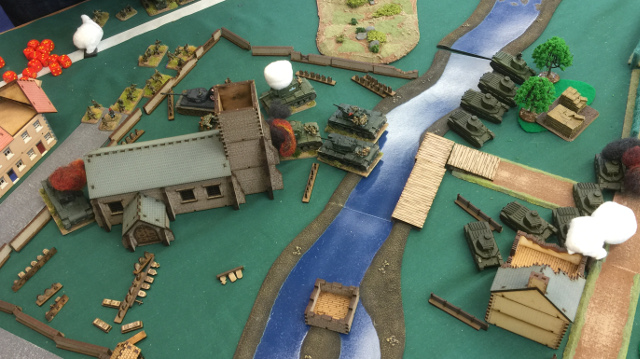
Tigers eye view at the start of the turn
Scout cars lurking in the shadows.
The turn ended thus:
Platoon of T-70 arrived, unable to do much though while moving, the KV-1 nailed one of the 8-rads, Tigger moving up and failing to nail the KV-1.
Pictures showing only a limited part of the board as nothing was happening anywhere else, this was soon to change as we had both left a platoon to guard against reserves.
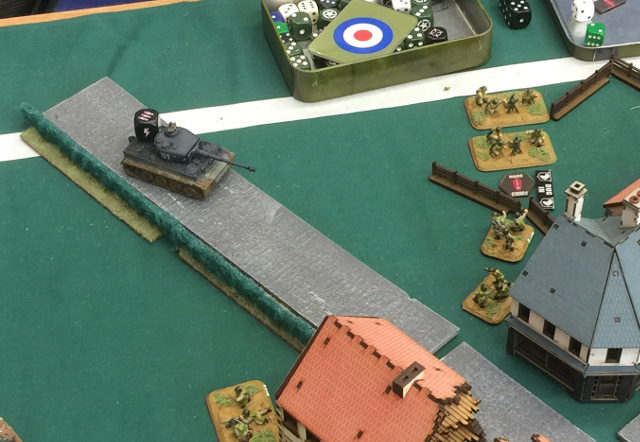
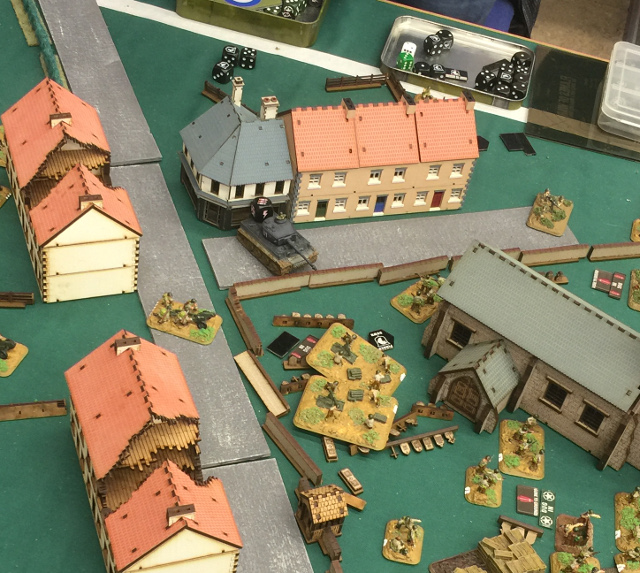
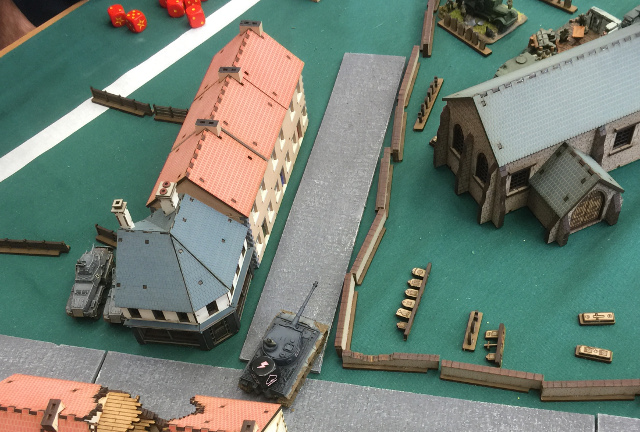
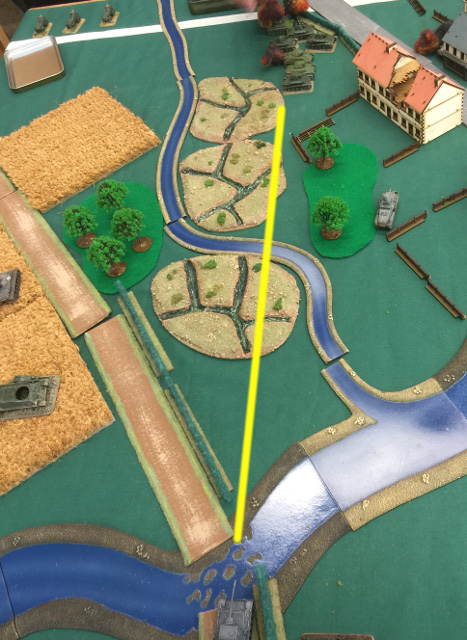
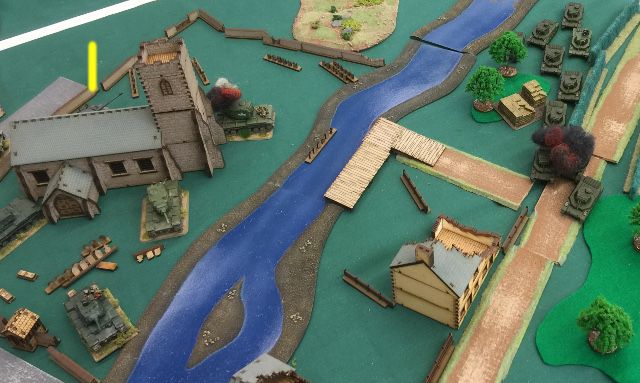
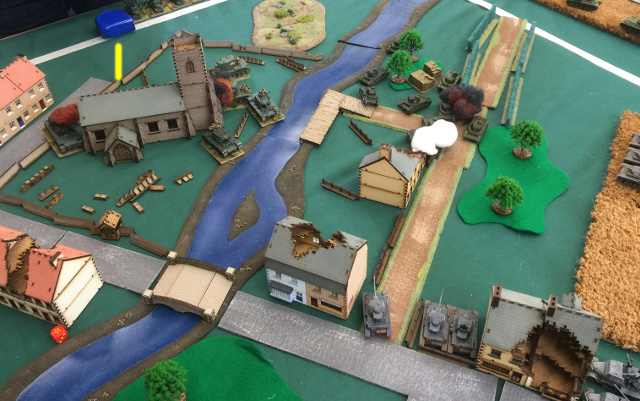
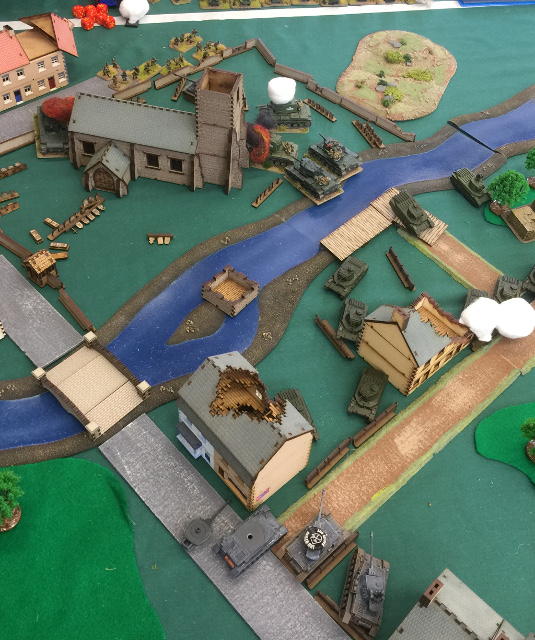
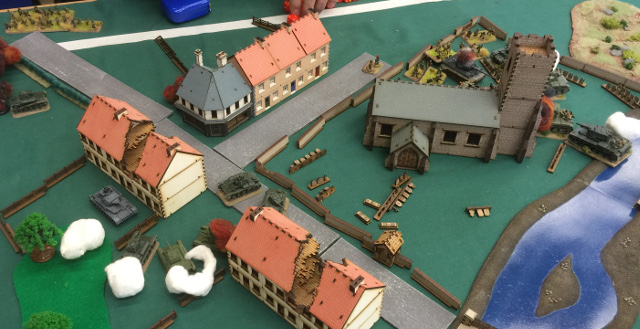
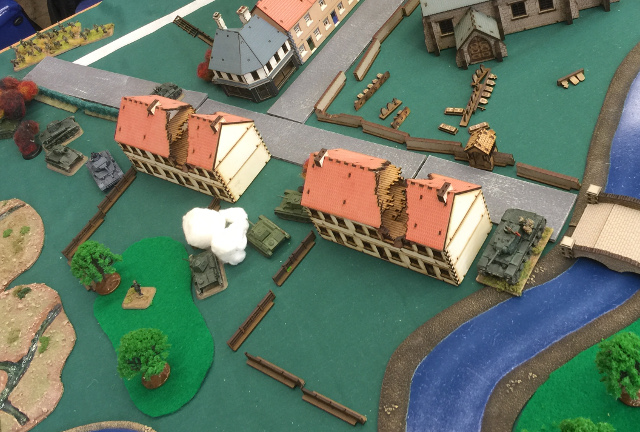
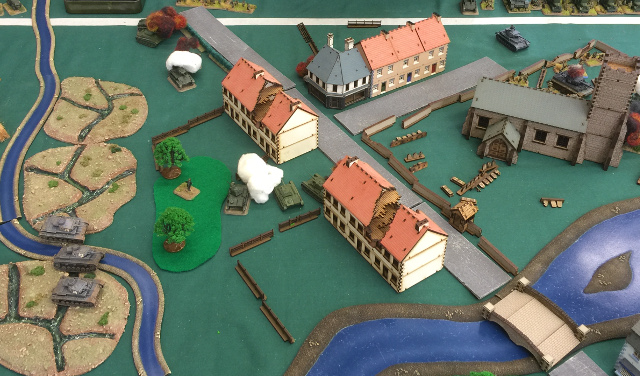
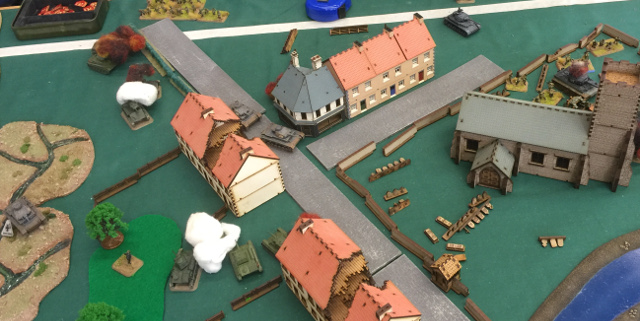
Turn FourTigger advanced, lurking behind the church (yellow marker to the centre)
The dead scout car to the right (the other yellow marker) was left well alone as the survivor pulled back, keen to avoid an easy platoon kill to that T-70 horde.
We now had an objective, though contested by the heavy Soviet tanks, Tigger enjoyed himself removing two more BM-13, causing a morale check.
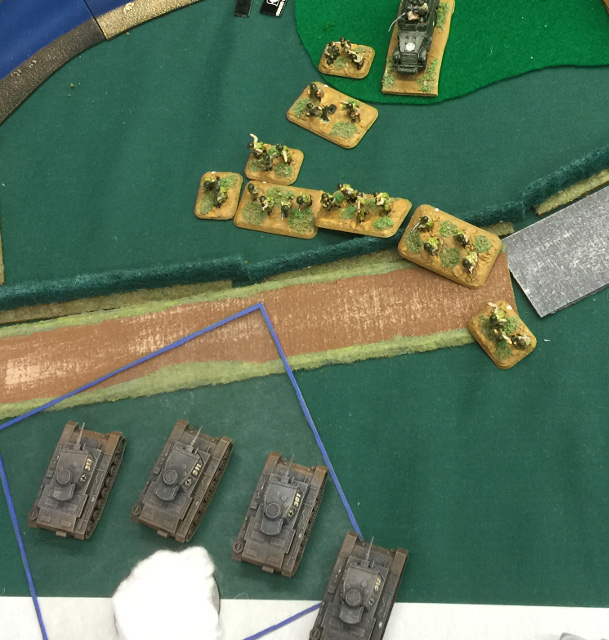
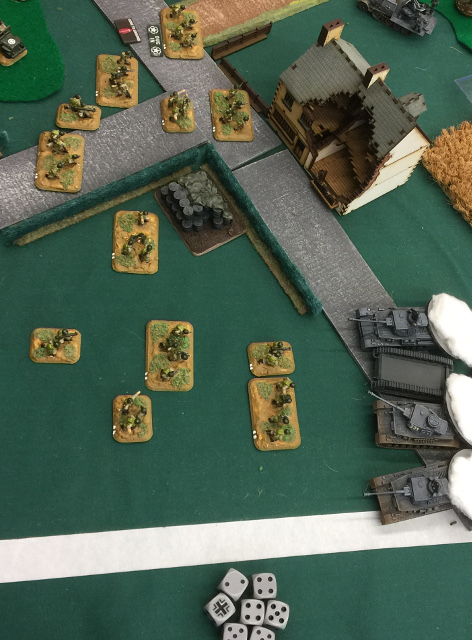
To the left my panzer IIIG started to move to get shots at the T-170, on the move we killed two, reasonably impressive, the lurking scout car can be seen in the centre
The CiC had also moved his Pz-IVG, and while the range was extreme finished off another T-70
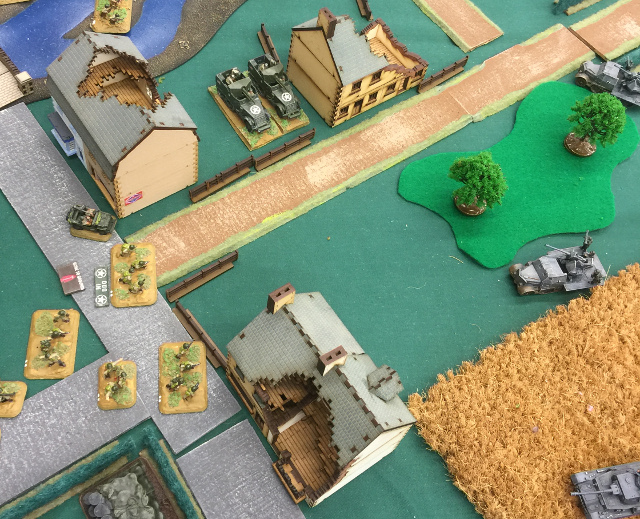
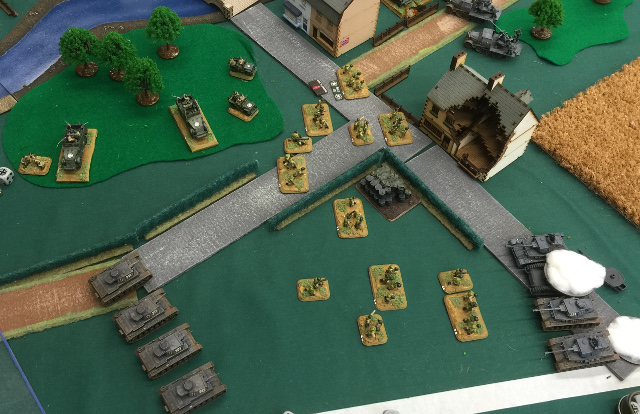
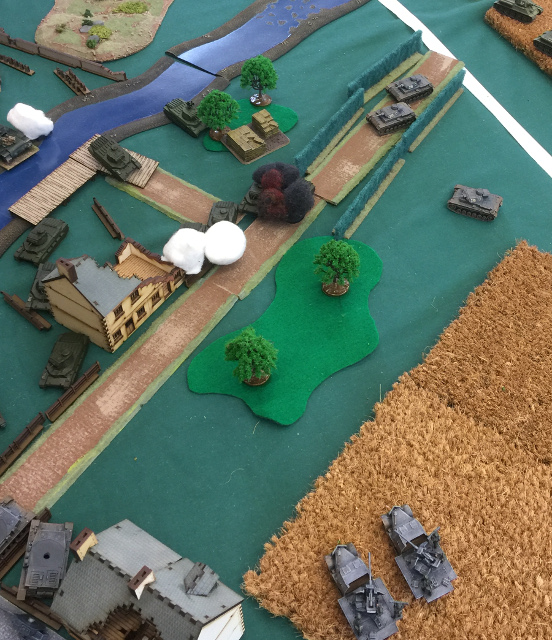
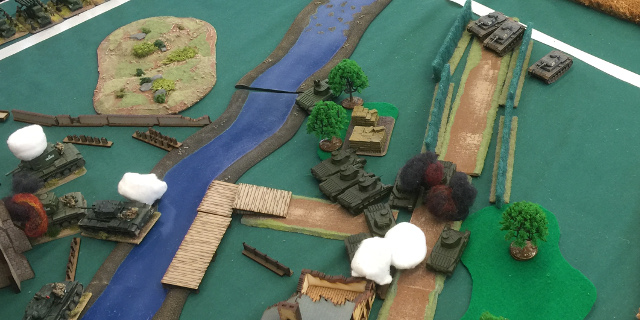
The Soviet turn saw a reaction to my reserves which had been quietly moving up, Pz-IVF2 leading with Pz-IIIG to the rear. Moving to minimise incoming fire they didn’t manage all that much but were moving into a useful position.
Finally the Matilda II horde started to rumble and the Soviet heavies moved, aiming for a flank shot at the tiger and to face the approaching medium armour.
The T-70 moved to try and avoid the Pz-IIIG
Thankfully their combined fire didn’t do anything of note.
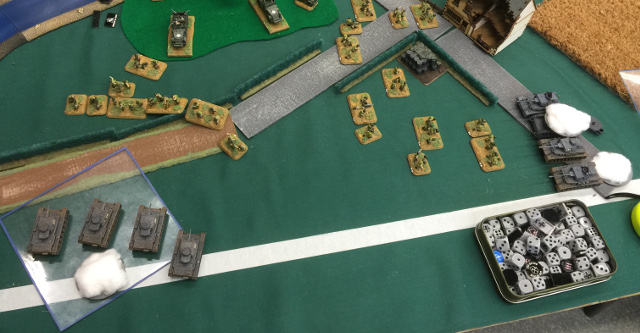
Turn FiveWith the Matilda approaching the Pz-IV moved to counter them, and get out of fire from the heavies, the Pz-III and flak tracks which couldn’t hurt anything anywhere near them moved to be out of sight.
Tigger contented himself with a turret rotation to maintain rate of fire.
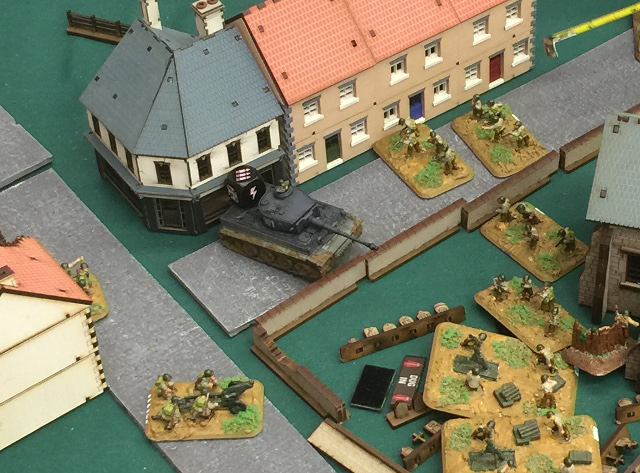
On the flank the other Pz-IIIG also moved up, to face the recently arrived Soviet infantry, the aim being to tickle them before they could do much.
Weapons fire had an effect
One KV-2 up in flames, along with several of the Matilda
Removed just under half the infantry, better than expected, but cannons at full RoF and then MG fire put out a lot of dice into exposed troops.
The Soviet turn saw the heavies moving back, sadly he had spotted I was on the objective, now tigger faced four heavy tanks alone, though only two able to fire, the KV-2 unable to hit anything having moved. The Matilda continued to advance thankfully diluting their impressive weight of fire.
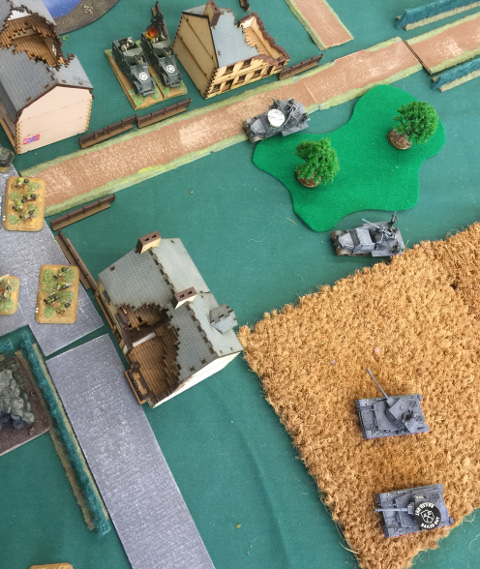
This turn also saw three armoured cars arrive, only MG armed so not able to hurt the panzers, for the life of me I have no idea why the deployed here
 and then didn’t move
They could have been on an objective, ok I could move to contest easily enough, but I wasn’t complaining.
the T-70 fired to no effect and once again Tigger survived along with the medium panzers.
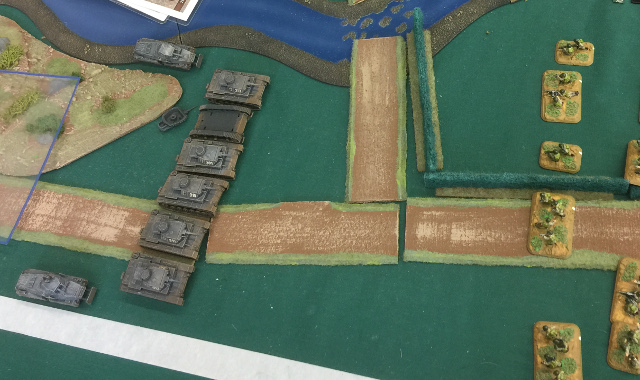
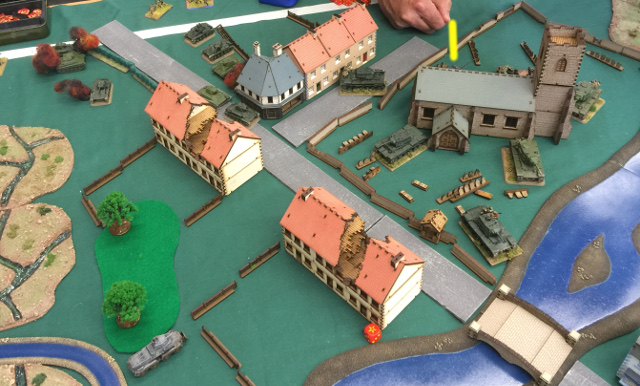
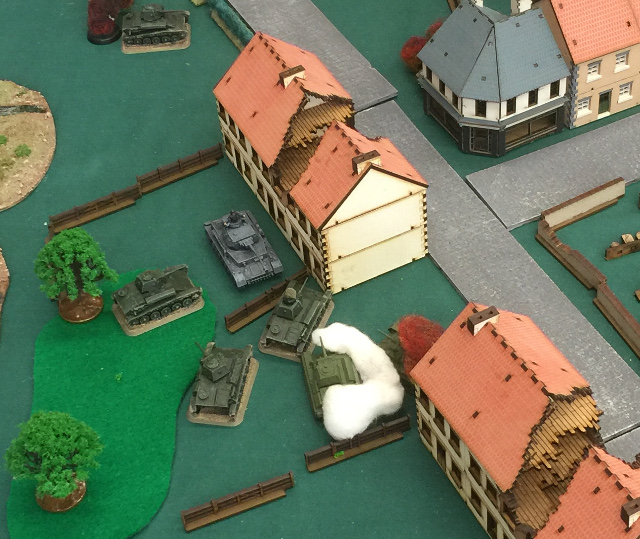
Turn SixNo way I was letting those scout cars live, turrets rotated and nine shots saw them with two dead, the third ran off

That was two platoon kills, and a potential flanking move countered
Back in the centre
Tigger nailed a KV-1, the Pz-IV nailed a few more Matilda and the Pz-III moved to get behind them, or at least give them pause for thought, I was hoping paranoia would get the better of statistics here, all the Pz-III really had for Matilda II was harsh language, possible bails only from the rear was a long shot at best.
Soviets moved again
Nailing one of the Pz-IV with a lucky KV-1 shot on the move they left the KV-2 contesting the objective, the Matilda pulled back to regroup, paranoia having won that little duel.
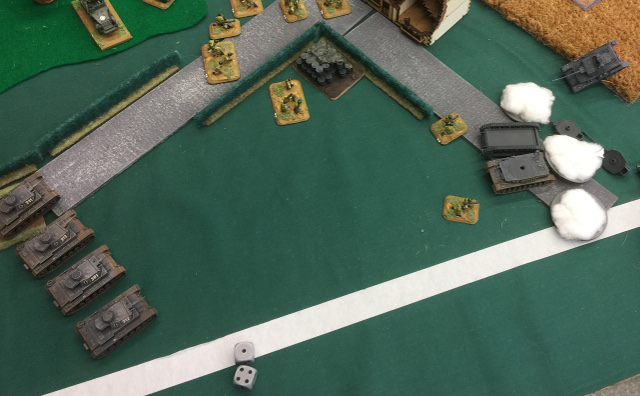
To the left
The long range tank duel continued, a Pz-III bailed out, interesting dual really, neither of us have good guns, my armour is fractionally better and a higher rate of fire, but out numbered, I dare not get to close range, it was only the ‘6’ to hit that kept us alive.
Turn Seven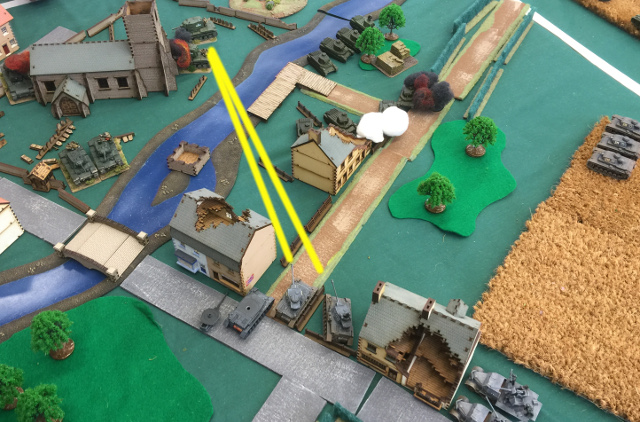
My Pz-III continued with the flanking move, the flak half tracks starting to head to defend my home objectives, surviving Pz-IV tried a shot in the dark, which failed, but was worth a try. Tigger bailed the KV-2 when he fired, again a failed firepower roll.
To the left
My CiC started to advance, Tigger alone couldn’t last, slowed by terrain we didn’t get too far, the gunnery duel continued, with bailed tanks only.
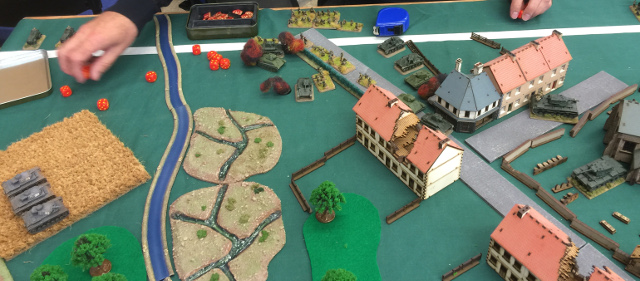
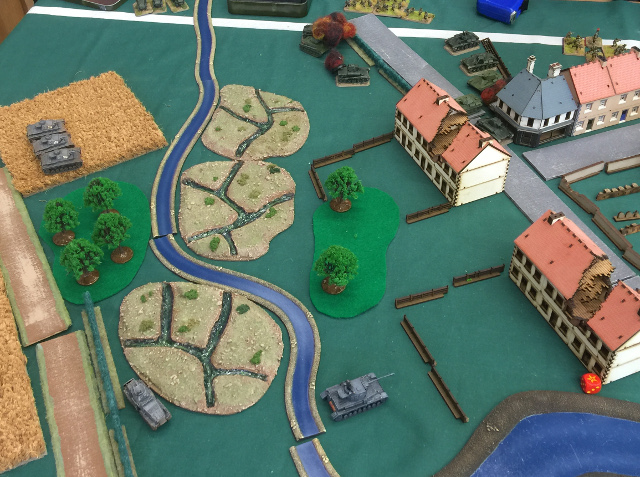
The Soviets started thus:
Heavy tank platoon teetering on the brink, but not yet testing, my opponent painfully aware of what that would mean for the game. Looking back I should have been pummelling those Matilda in the rear to much greater effect.. ho hum.
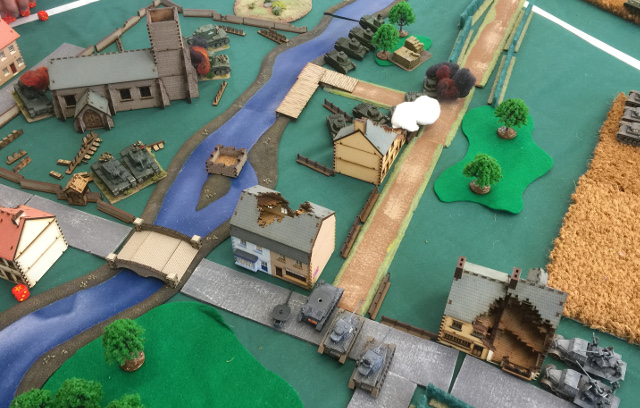
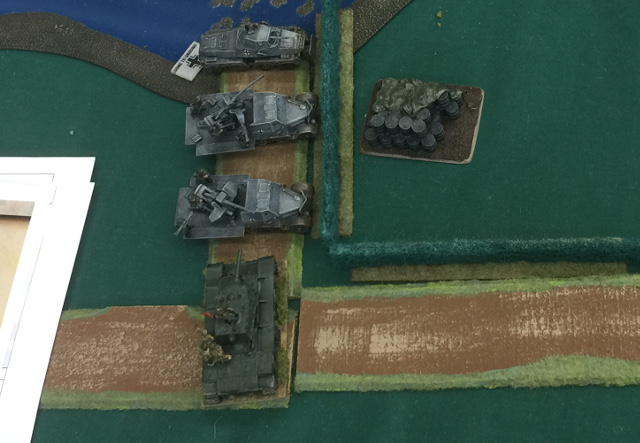
The left started thus:
Bailed out T-70 (under the white smoke marker) and my CiC having taken advantage of the Storm Trooper move to advance slightly.
They moved up the infantry, unable to do damage in assault, the PTRD they had not being able to assault but scary if I went for them, the heavies came back to help secure that objective.
Matilda moved to pick on the Pz-IV, bailing one of them
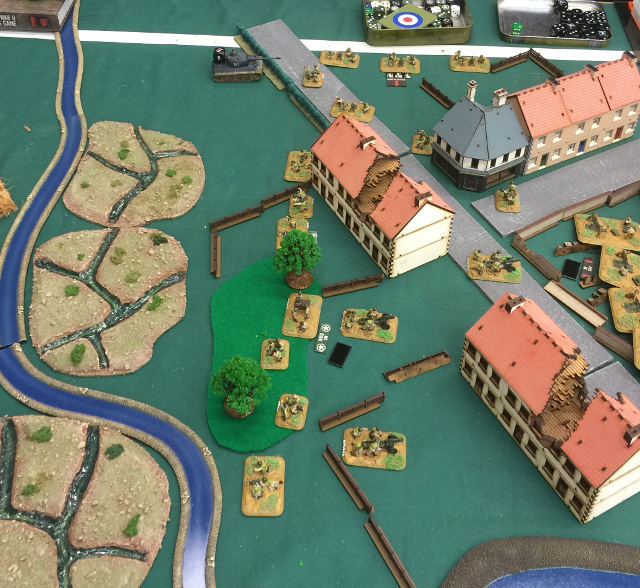
 Turn Eight
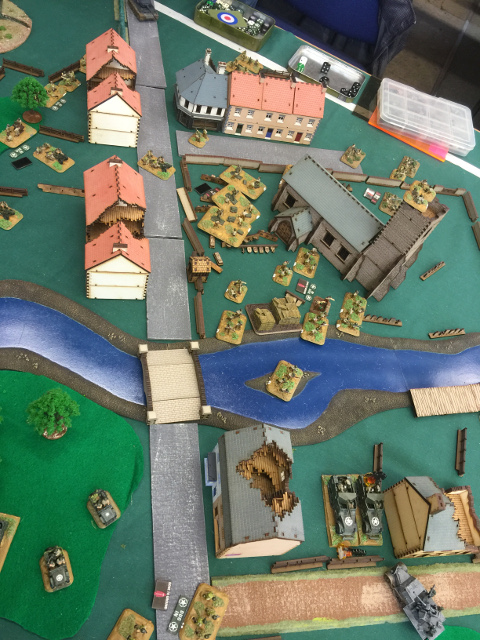
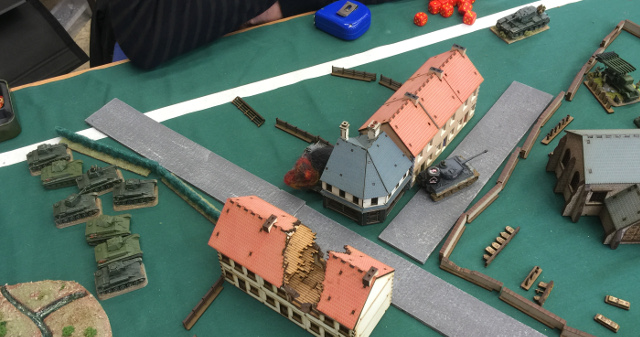
The end of my turn saw the situation thus in the centre
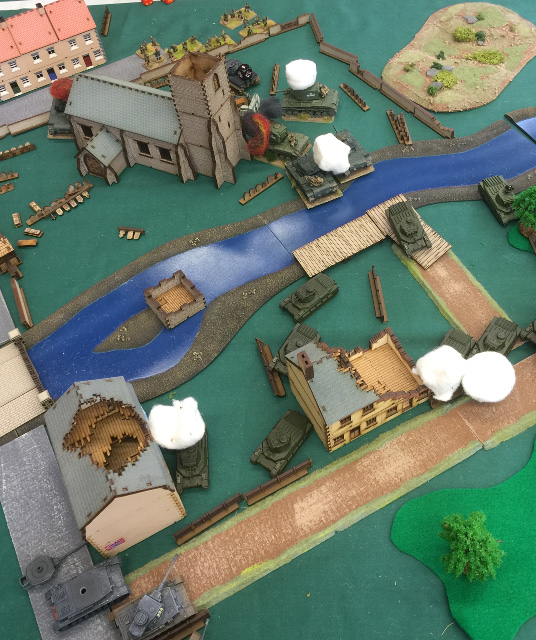
One more dead Matilda, and a bailed KV-1, though they passed the morale check
The the Soviets had a turn…
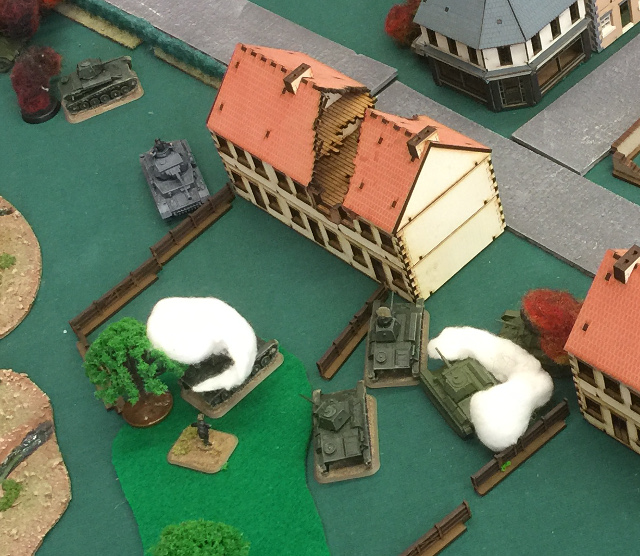
In one turn the game pivoted, the Pz-IV were wiped out and tigger was bailed, then captured by his infantry, at a stroke everything I had that could hurt those heavy tanks was gone, my CiC was surrounded by T-70, the game now depended on some Pz-IIIG who couldn’t hurt the surviving Soviet armour bar a few light tanks, a single scout car and a pair of AA half tracks…
Turn nineAt this point we were both down two platoons, so this was a 3:4 or 4:3, really just playing for honour now with little to actually lose we pressed on.
The flak halftracks and Pz-IIIG moved to attack, utterly unable to hurt anything but the plan was simple, distraction, not so much playing for time but playing to a
very long shot.
If I could get the Matilda away from the objective, and the KV-1 had to move to try and capture one of mine
just perhaps I could flush that infantry with my CiC, if he survived…
Sadly surrounded by Soviet armour my CiC had a problem
Solved, in part through luck and guile, remaining stationary he killed one T-70 and bailed another, then reversed with the storm trooper move. His front armour
6, being a Pz-IV
G meant those T-70 would struggle from the front, so I hoped to keep them moving for flank shots and use Hens & Chicks to deny them many hits..
We ended on the right flank thus
Playing a very dangerous game of chicken, banking on the Soviets being unable to hit…
Soviet Turn..
The T-70 remounted, on a 3+ that was never really failing, but they had to move to get shots
Thankfully the Matilda horde also moved
meaning ‘6’ to hit, and a single shot each
No effect…
Turn TenCiC pulled back, hindered by a fence slowing him down, bailed another T-70, they still passed the morale checks
The Pz-III pulled back, I wanted to keep the Soviets moving

I was only getting away with this as the Soviets were timid in the extreme
I also moved up on the left to form what looked like a defensive line, but had a little more going for it, really aimed at stopping the T-70 getting any fancy ideas about objectives, which thankfully they seemed to have forgotten all about.
The Soviets moved.. and Trouble
The sole surviving heavy tank was on the prowl, tanking care to stay so my CiC couldn’t see it, again paranoia, the Pz-IVG is nice but not that nice against a heavy.
T-70 shuffled to again get a flank shot
Out to the right
One Pz-III fell, the others having storm troopers back further for a bit of cover.
Starting to look desperate, I needed to do something in the three or four turns before that KV got to the objectives.
A thought occurred..
It would get there, I after all couldn’t really stop it, but it still had to actually kill my halftracks and scout car.. who could dance a while, I had a little more time, but not much, and it depended on keeping those Matilda where they were, the Panzer IIIG would need to dance a little longer in the jaws of death.
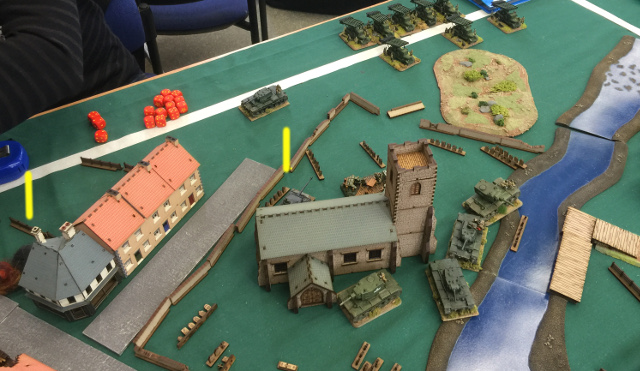
Turn ElevenI ended thus:
my Cic where the yellow marker is, deciding he had had enough of playing tag with the T-70, moved up and killed the one he could see, my gun line going to ground so as to be impossible to hit at range, or for a moving KV up close.
Stormtrooper move saw the CiC lining up on the infantry, such that only the PTRD team was in sight. around the blazing tiger wreak.

To the right, just to be annoying the Pz-III went to ground also
Again simply to make a ‘6’ needed to hit them
Turn TwelvePanzers, having survived pulled back a bit further, to again be at long range, so still a six to hit, but to tempt the Soviets to move once more.
The flak halftracks also moving
To the centre a bit more effort was needed ,with the T-70 now dead the other Pz-III threw caution to the wind and entered the swamp, as the CiC moved to the infantry it was obvious he couldn’t do that alone.. could they get there before that KV-1 got to my objectives? A gamble, but a worthwhile one with nothing to lose really.
The Soviets moved up the Matilda, the KV continued rumbling towards the road behind the wood to the bottom, making damn sure no long range CiC panzer would gate a rear shot..
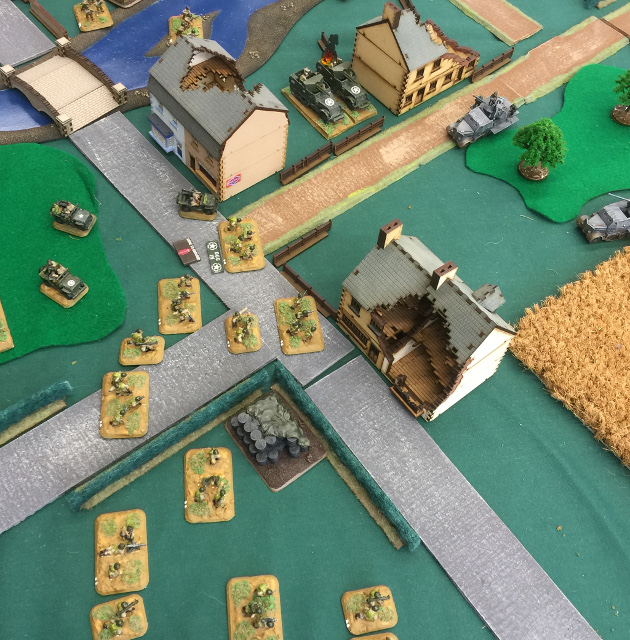
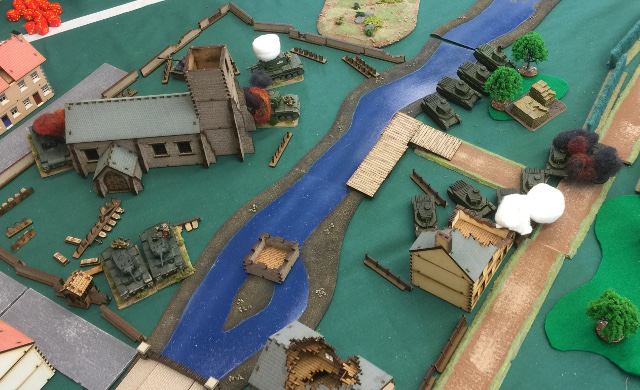
Turn Thirteen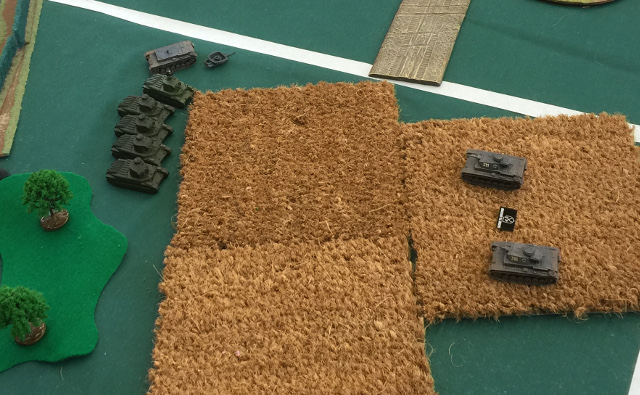
On the right we went back to ground, there being no space left to run really
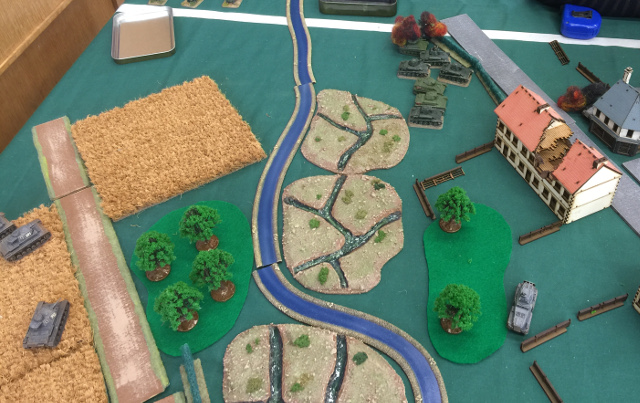
To the left my flak guns could see what was coming
Some wee came out, fortunately a river was nearby, the flow increased a small but noticeable amount.
They went to ground, the Soviets in their turn advanced

Thankfully unable to hit…
Turn fourteenThe panzers, now clear of the wood advanced to help the CiC
My scout car moved down to also contest, the Soviets jumped the hedge, but thankfully even though now
able to hit they missed..
It was do or die at this point..
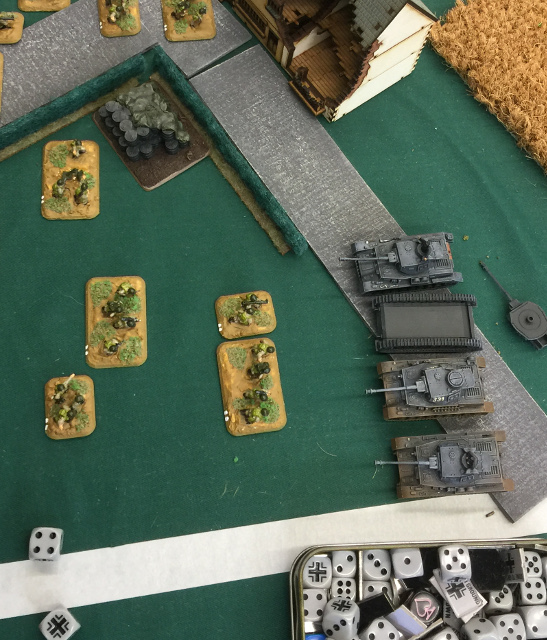
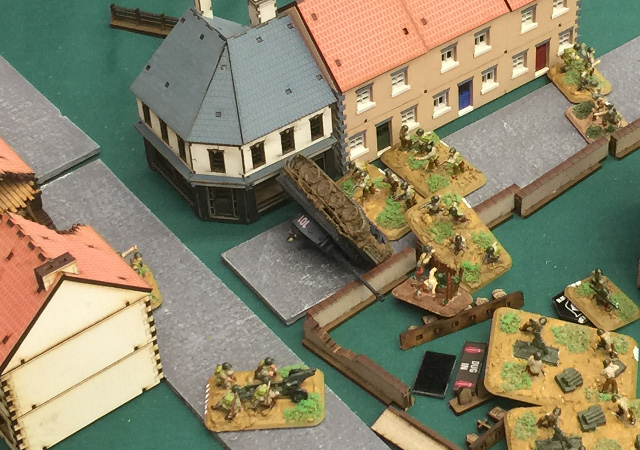
Panzers piled forwards to assault range, and in they all went, fingers and everything else crossed..
[img[http://www.aleopardstail.com/IMG_1252.JPG[/img]
It worked, the infantry was gone, the gun team survived, but failed morale and fled,
To the left my scout car pulled back, not wanting to be another kill, which would force a morale check, which was now the Soviets only hope, the half tracks tried to get some cover..
tried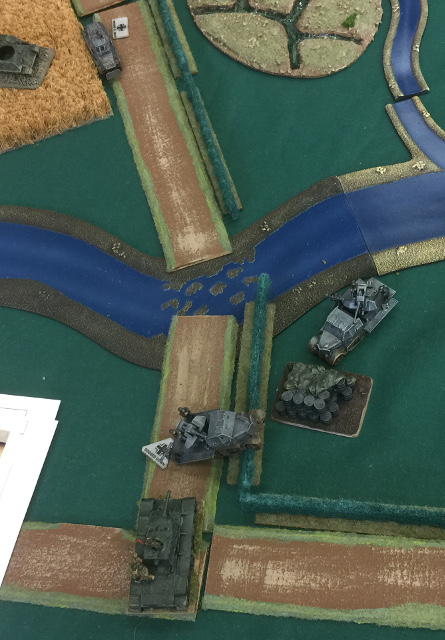
Soviet marksmanship however again came to my rescue..
2. Panzer won the top of turn sixteen… 4:3,
very close.
This has to have been one of the most intense, yet fast flowing games I’ve ever played pivoted a few times, but for once, the plan worked..
The first tournament victory for 2. Panzer mid war…